So, you want to tie flies?
Getting started fly tying can be a daunting undertaking. Luckily you came to the right place. We have all gone through the process and are here to help you take the next step in fly fishing. Granted, fly tying is not for everyone, but it is absolutely something that every fly fisher should try! In this installment of getting started we will walk you through the initial process of selecting the correct vise and tools to get started tying your own flies. Not only is it a great way to spend the winter months, but the satisfaction of catching fish on something you made is pretty cool.
Tying kits, vises, and tools oh my!
Vises
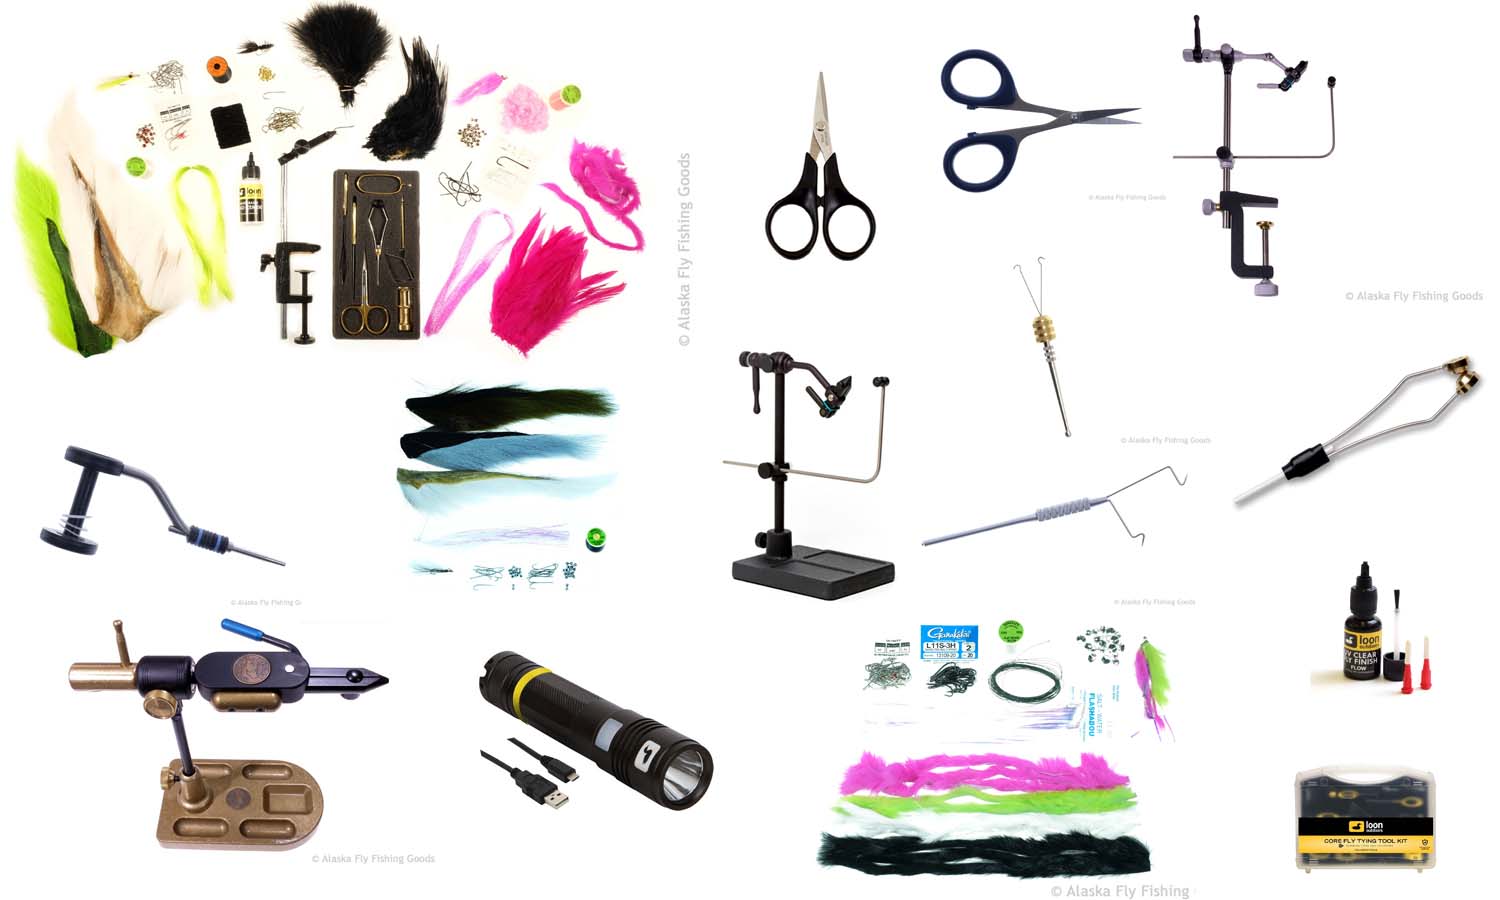
Fly tying vises are the most critical piece of gear for getting started fly tying. The right vise will grow with you as a tier and will last as long as you want it to. All tying vises have one critical job to do: hold your hook securely while you tie the fly. More expensive vises have functions that allow more flexibility while tying. First, decide whether you want a standard fixed head vise or a rotary vise. Rotary vises are more expensive, but they are also more versatile. The rotary function allows you to "rotate" the fly upside down while keeping it secure in the jaws of the vise. Secondly, you should consider the types of flies you will be tying. The vise for tying #20 midges is likely not going to be the vise you want for tying 40lb. king salmon flies. Finally, decide whether you want a c-clamp vise that attaches directly to a table top or a pedestal model that sits on top of a table. The c-clamps are bit more secure but the pedestals are a more versatile in terms of where you can tie.
If you are on a budget the Griffin 1A vise will get the job done. This vise is bare bones and if you continue with fly tying you will almost certainly upgrade, but it will get you going. If you know you will be tying a lot of flies, we highly recommend getting a mid-level vise with a rotary function. We like the Renzetti Traveler Pedestal for most people. This vise is compact enough to take with you, has a full rotary function, and will last forever.
Bobbins
A bobbin is the tool used to hold thread. Two strong pressure points hold your spool of thread as it is redirected at a 90-degree angle. Bobbins come in several different variations. Tensioning bobbins are adjustable so they maintain constant pressure for you. Standard bobbins require the tier to manually apply pressure to tension the thread. Rite bobbins are a very good tensioning bobbin and can be set to provide a nice consistent drag. Cheaper bobbins will usually have stainless steel as the lining of the bobbin tube. This works for awhile but in time they can develop burrs that will cut your thread which is incredibly annoying. Ceramic bobbins cost a little more to start with, but they generally last longer and they won't cut your thread.
Tensioned bobbins vs non-tensioned bobbins are a matter of personal preference. If you are looking for a bobbin that will apply "drag" to the thread for you, Rite Bobbins can't be beat. For a standard bobbin the Standard Ceramic Bobbin by TMC is our choice. Ceramic bobbins are worth the extra cost, trust us.
Scissors
Scissors are another critical tool while fly tying. Scissors are broken down into two categories, tying scissors and utility scissors. Tying scissors are the ones you will hold the whole time you are tying. They are best used for cutting thread, trimming extra material that has been attached to the hook and shaping small flies. Utility scissors on the other hand are a little more purposeful. The idea behind them is to do the heavy cutting chores and cutting material that would dull the more delicate "tying" scissors. Examples of these heavy-duty tasks include cutting braid or spectra for stinger flies, cutting wire or lead, and cutting large patches of material. If you try and use "tying" scissors for these tasks you will dull them prematurely and render them useless. Our advice is to spend more on your tying scissors and supplement them with a relatively inexpensive braid or synthetic scissor.
The Dr. Slick Arrow Scissors may not look fancy, but they are affordable and very sharp. Pair these scissors with some Dr. Slick Braid Scissors and you will be able to handle any cutting task you will encounter while tying flies.
Misc Tools
In addition to scissors and a bobbin there are a few other tools that deserve a home on your tying desk. A bobbin threader is a light wire tool that is designed to help thread you bobbin. This will save you time and frustration in the long run. A whip finisher is a tool designed to finish your fly in the most secure way possible. Whip finishers take the place of using your finger for half hitches. When done correctly a few secure whip finishes is as good as any head cement. There are two tools that are dubbing specific. These are dubbing brushes and dubbing spinners. A dubbin brush is a stiff wire bristle brush that allows you to comb out dubbed heads or equally position material for use in dubbing or "composite" loops. This is handy when tying flies such as intruders.
Summary
There are many more tools than what was covered in this overview. From foam cutters to hackle gauges, UV lamps to dubbing wax, the options are endless. Until you decide that you are into fly tying, however, stick with the basic tools. The three tools you need the most are a bobbin, scissors, and a whip finisher. These three tools will get you started and won't break the bank. Another great option is to just buy a toolkit. Dr. Slick and Loon both make comprehensive kits with all the tools you need. The tools that come in these kits are not fancy but work well and they include almost all of the tools you will need. Getting started fly tying is fun and exciting, and we are here to help!
If you have any questions about selecting the correct vise and or tools, feel free to e-mail us or call the shop at 907-586-1550.


I live in Vancouver, BC. I visited your store in July of last year and bought some supplies to tie some wooly leaches. I am new to this hobby and would like to k on how I can access your instructional videos on tying various flies.
Hi Randy,
All of our fly-tying instructional videos are located in the drop-down menu at the top of our page. If you hover over the How To’s near the search bar, select Fly Tying- Alaska Patterns. This is where to access our tying videos for specific patterns. I hope this helps, please don’t hesitate to ask if you have any other questions. Cheers!
Cory Hansen